My Tutorial Blog

Favorite Stores


Sites I visit


Sunday, October 25, 2020
Steamy Memories

Saturday, October 24, 2020
Graveyard Bones

Monday, October 19, 2020
Scintillating Scarlet

Saturday, October 17, 2020
Witch's Helper

Friday, October 16, 2020
Crumbling Parchment

Taste of Halloween
Midnight Memories

Thursday, October 15, 2020
Little Witches

Wednesday, October 14, 2020
Thanksgiving

Monday, October 12, 2020
Dance Party

Book of Wonders

Kisses to Heaven

Kit is no longer available.
PTU Tube: I am using Nocturne's beautiful new tube "Halo". Please do not use this tube without a proper license. You can purchase this beautiful tube at PFD here.
PTU Animation: I am using Rebel Dezigns awesome animation 1131 from pack 376. You can purchase her animation here.

Sunday, October 11, 2020
Morganna

Marisa

Saturday, October 10, 2020
Steam Wishes

Death Becomes Her

Friday, October 9, 2020
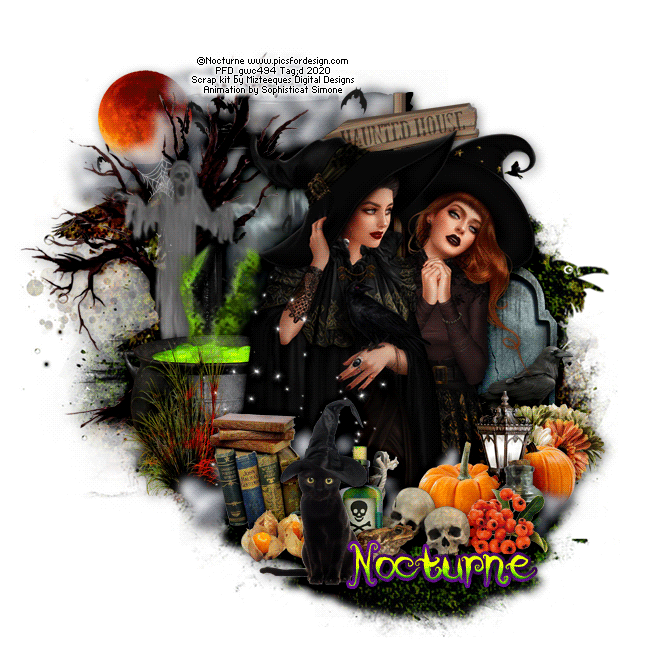
Sisters

Wednesday, October 7, 2020
Bewitchen Beauty

Sunday, October 4, 2020
Gwils Creations FTU Animations
So I am trying my hand at making some Animations. This is a once in a while project I think :)
I hope you like it and will enjoy using my FTU animation. All animation has a psd and mng file included in the zip.
All animations are for Personal use only. Please do not shared. Please link back to my blog if you are using my animations in a tutorial.
Animation 1. (Leaves).

You can download it here.
Autumn Walk tutorial here.
Animation 2. BCA

You can download it here.
Steampunk Ani

You can download it here.
Tutorial here.
Saturday, October 3, 2020
Autumn Walk

Autumn Dream

Subscribe to:
Posts
(Atom)
My Blinkie


I CT for

